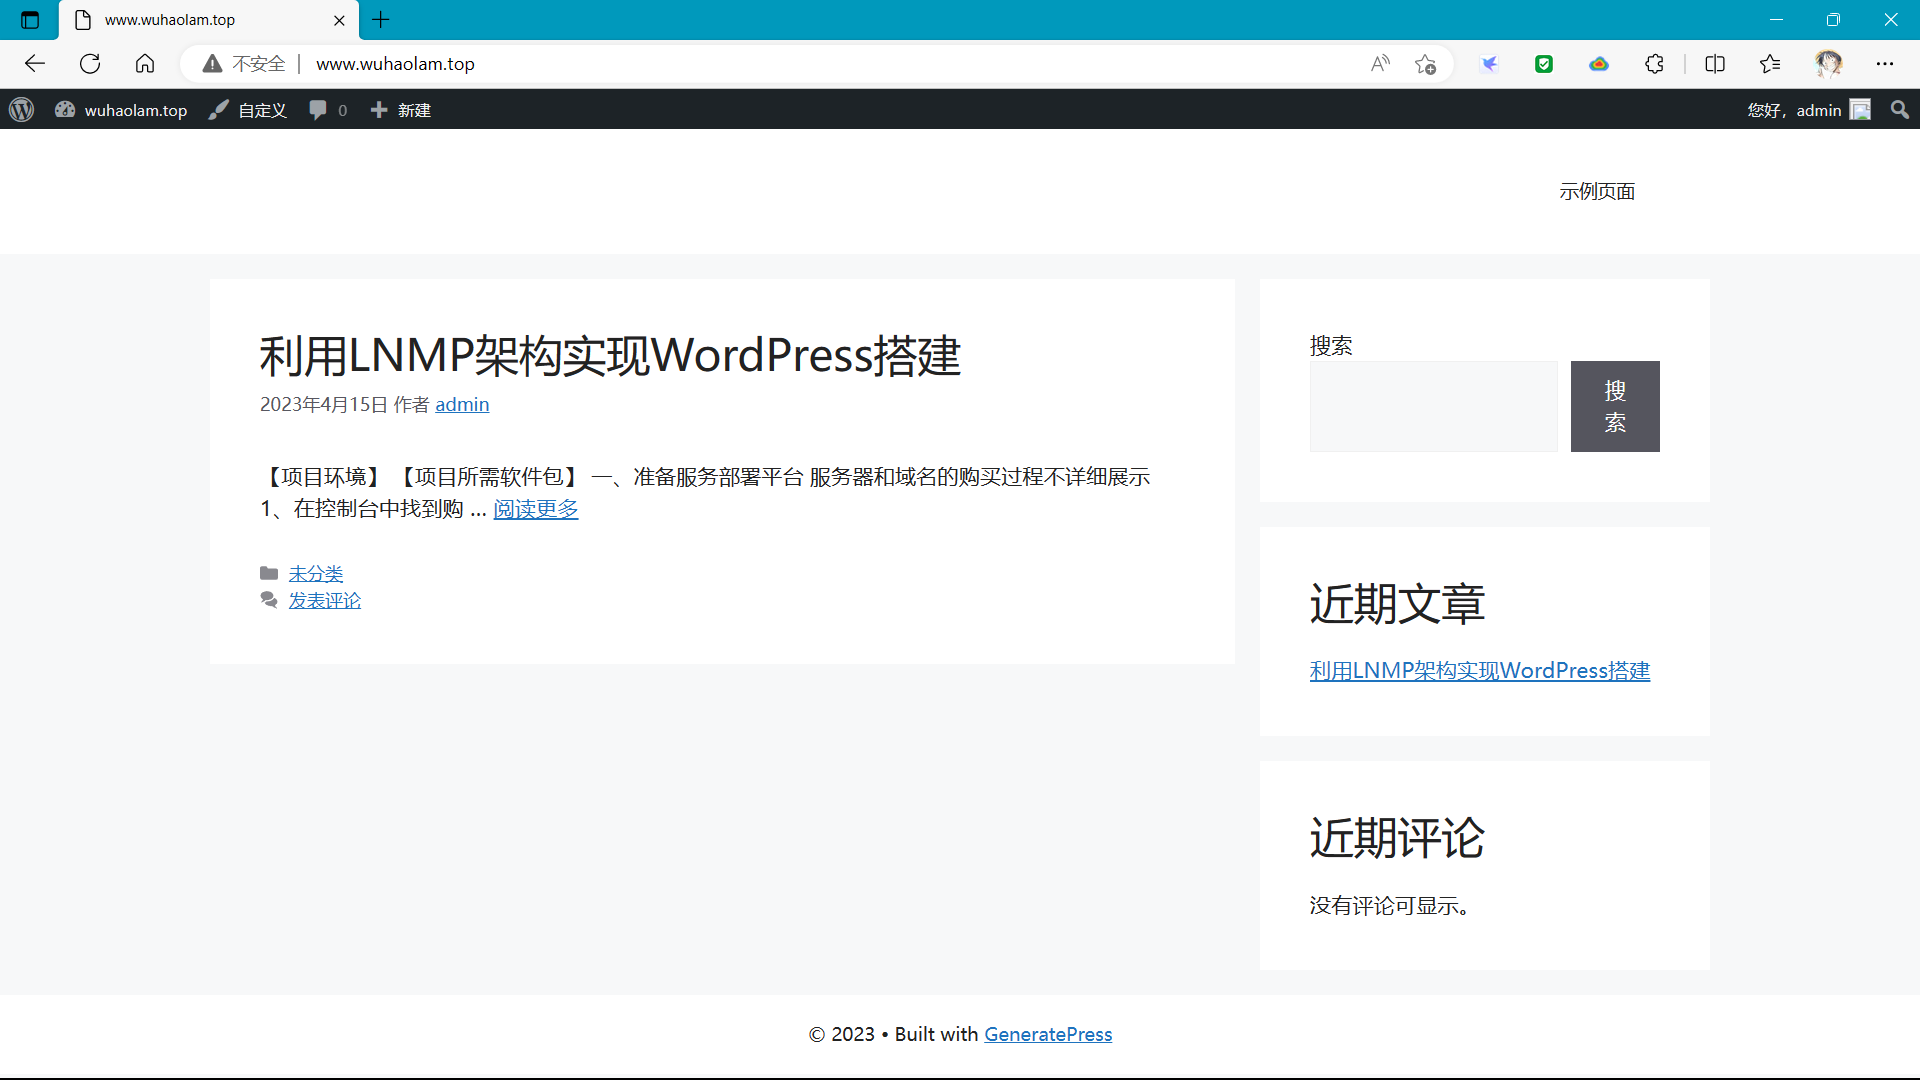
【项目环境】
1
2
3
4
5
6
7
8
9
|
Alibaba Cloud Linux release 3 (Soaring Falcon)
wuhaolam.top
[root@wh-aliyun ~]
mysql-5.7.40-linux-glibc2.12-x86_64.tar.gz nginx-1.18.0.tar.gz php-7.4.30.tar.gz wordpress-6.2-zh_CN.tar.gz
|
【项目所需软件包】
1
2
3
4
5
6
7
8
9
10
11
| MySQL 5.7.40
https://downloads.mysql.com/archives/get/p/23/file/mysql-5.7.40-linux-glibc2.12-x86_64.tar.gz
NGINX 1.18.0
https://nginx.org/download/nginx-1.18.0.tar.gz
PHP 7.4.30
https://www.php.net/distributions/php-7.4.30.tar.gz
WordPress 6.2
https://cn.wordpress.org/wordpress-6.2-zh_CN.tar.gz
|
一、准备服务部署平台
:warning:服务器和域名的购买过程不详细展示
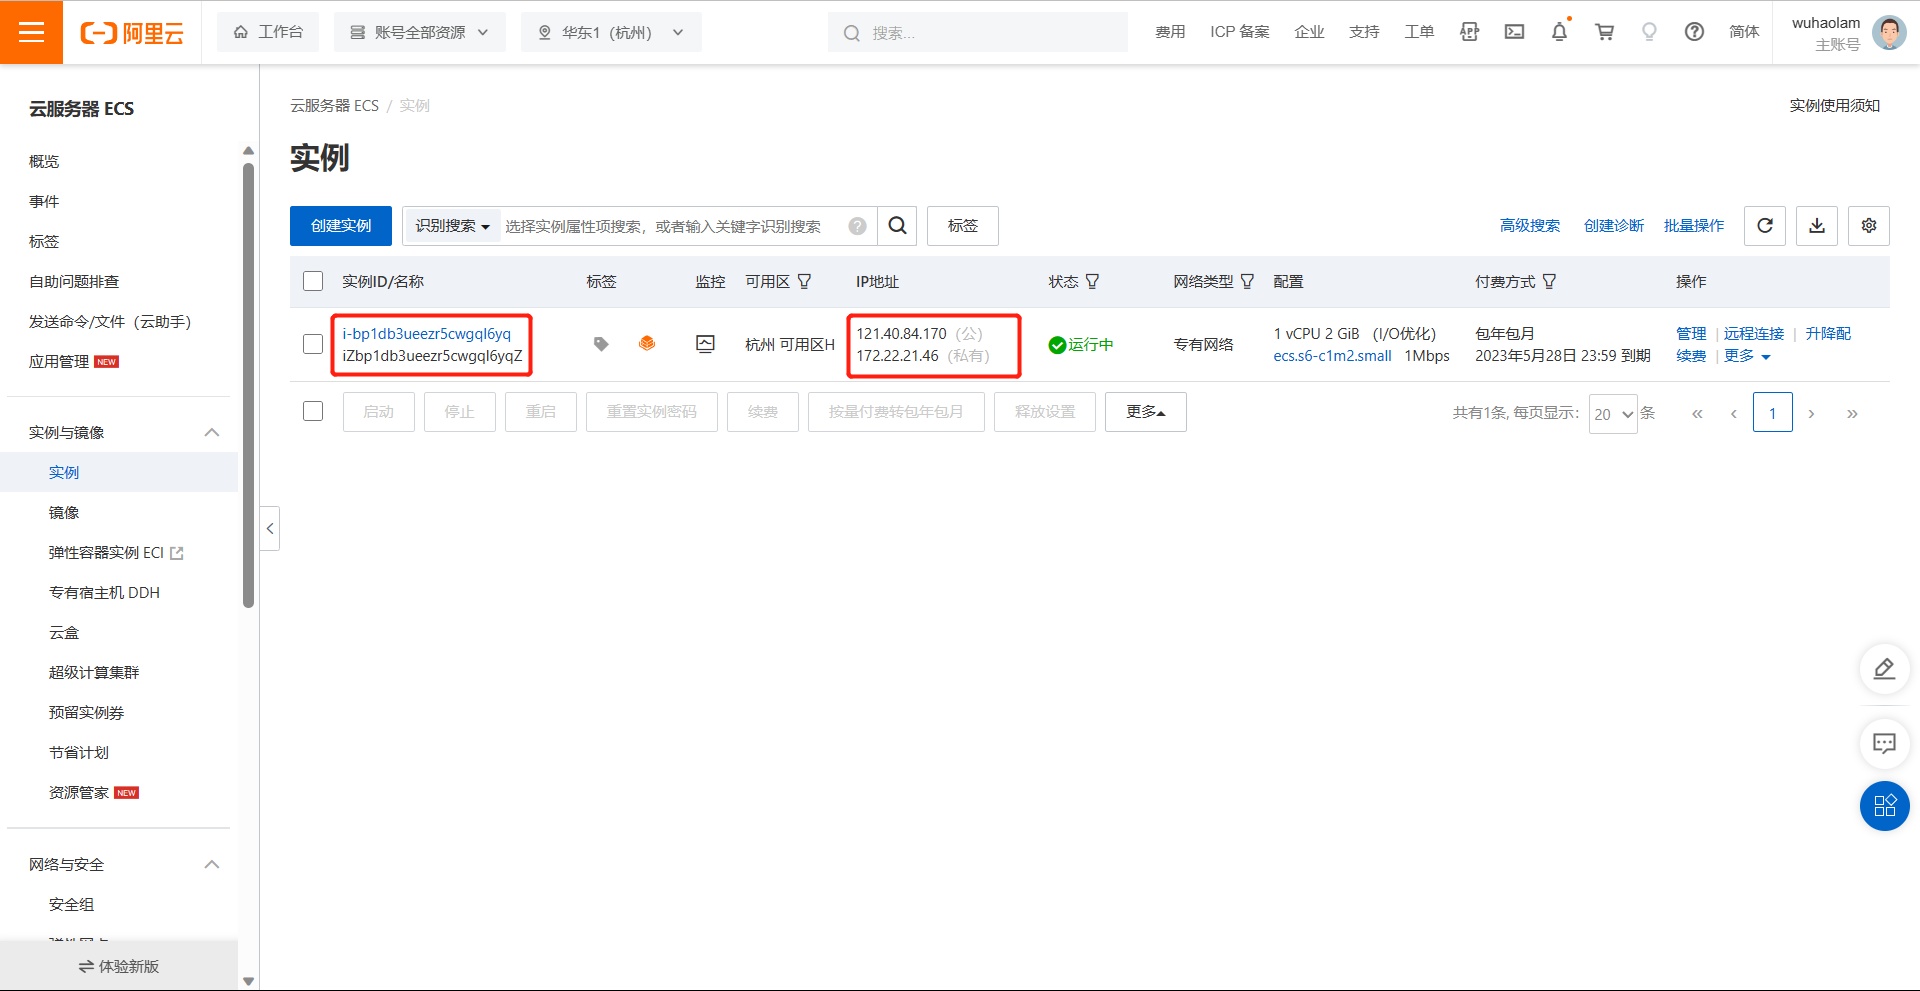
1、在控制台中找到购买成功的阿里云服务器,记住自己的公网和私网IP地址
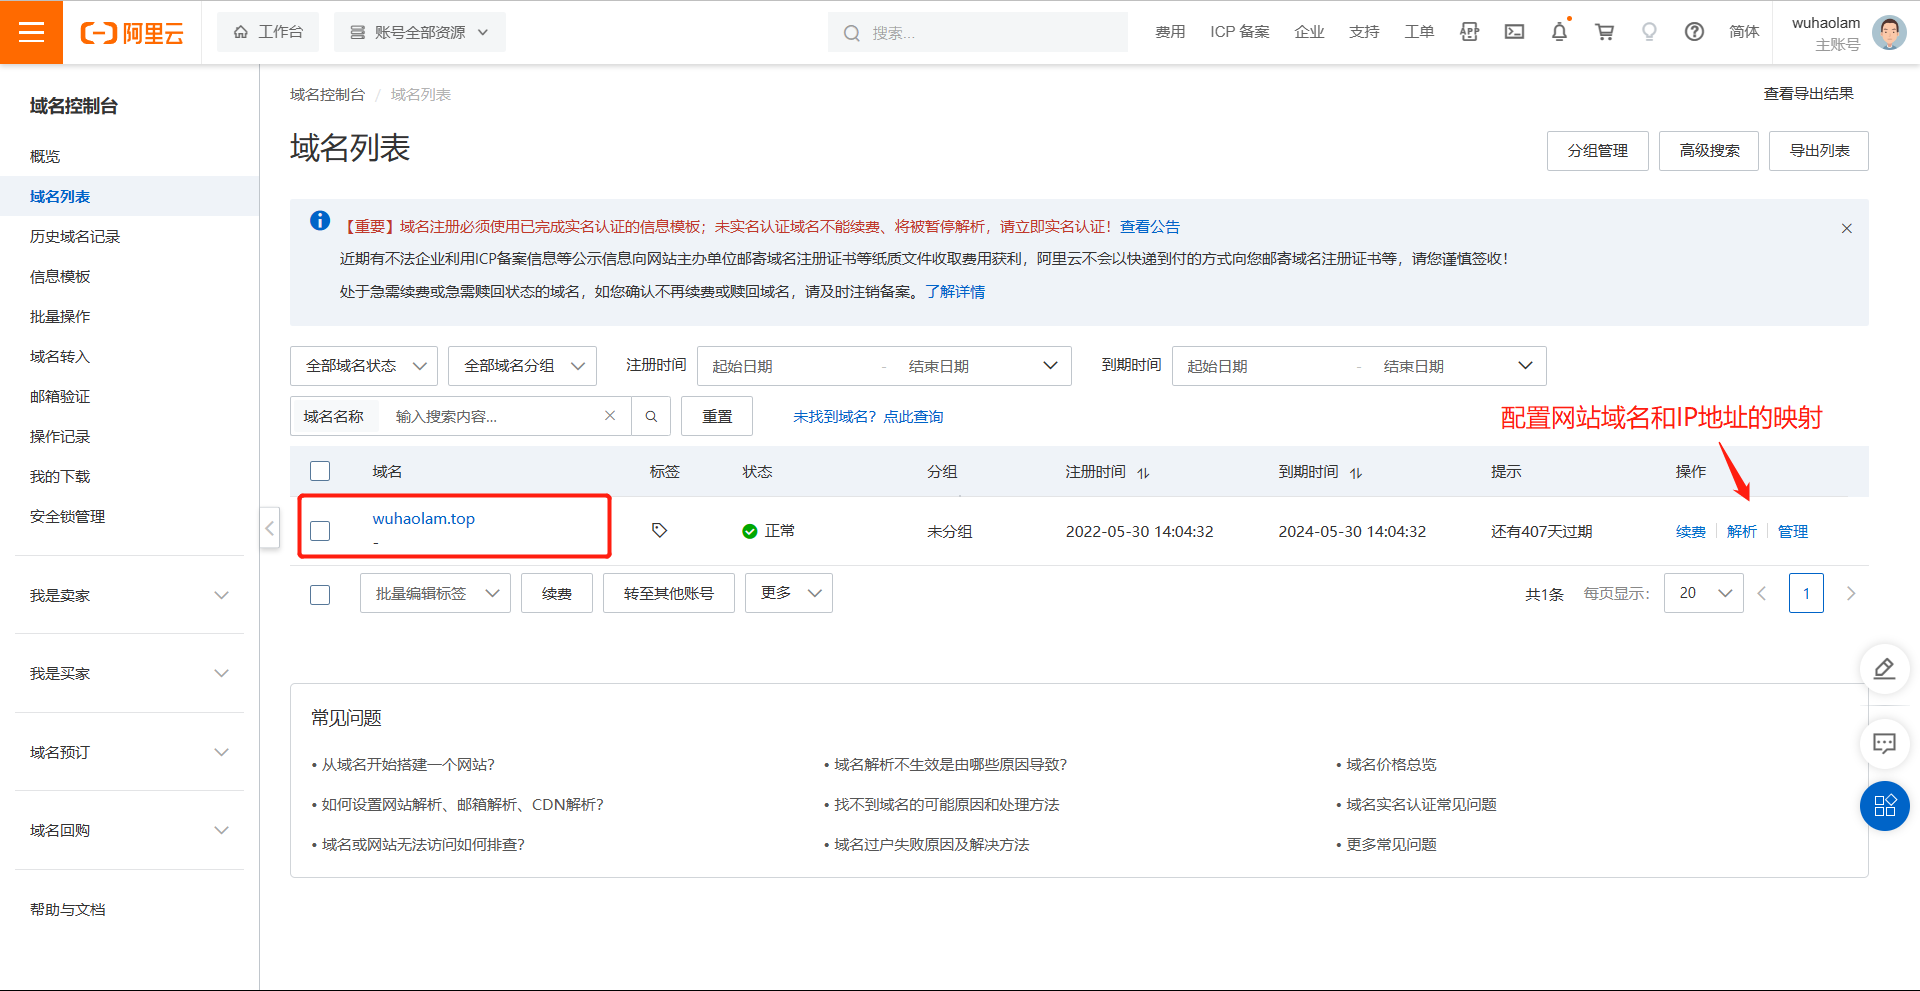
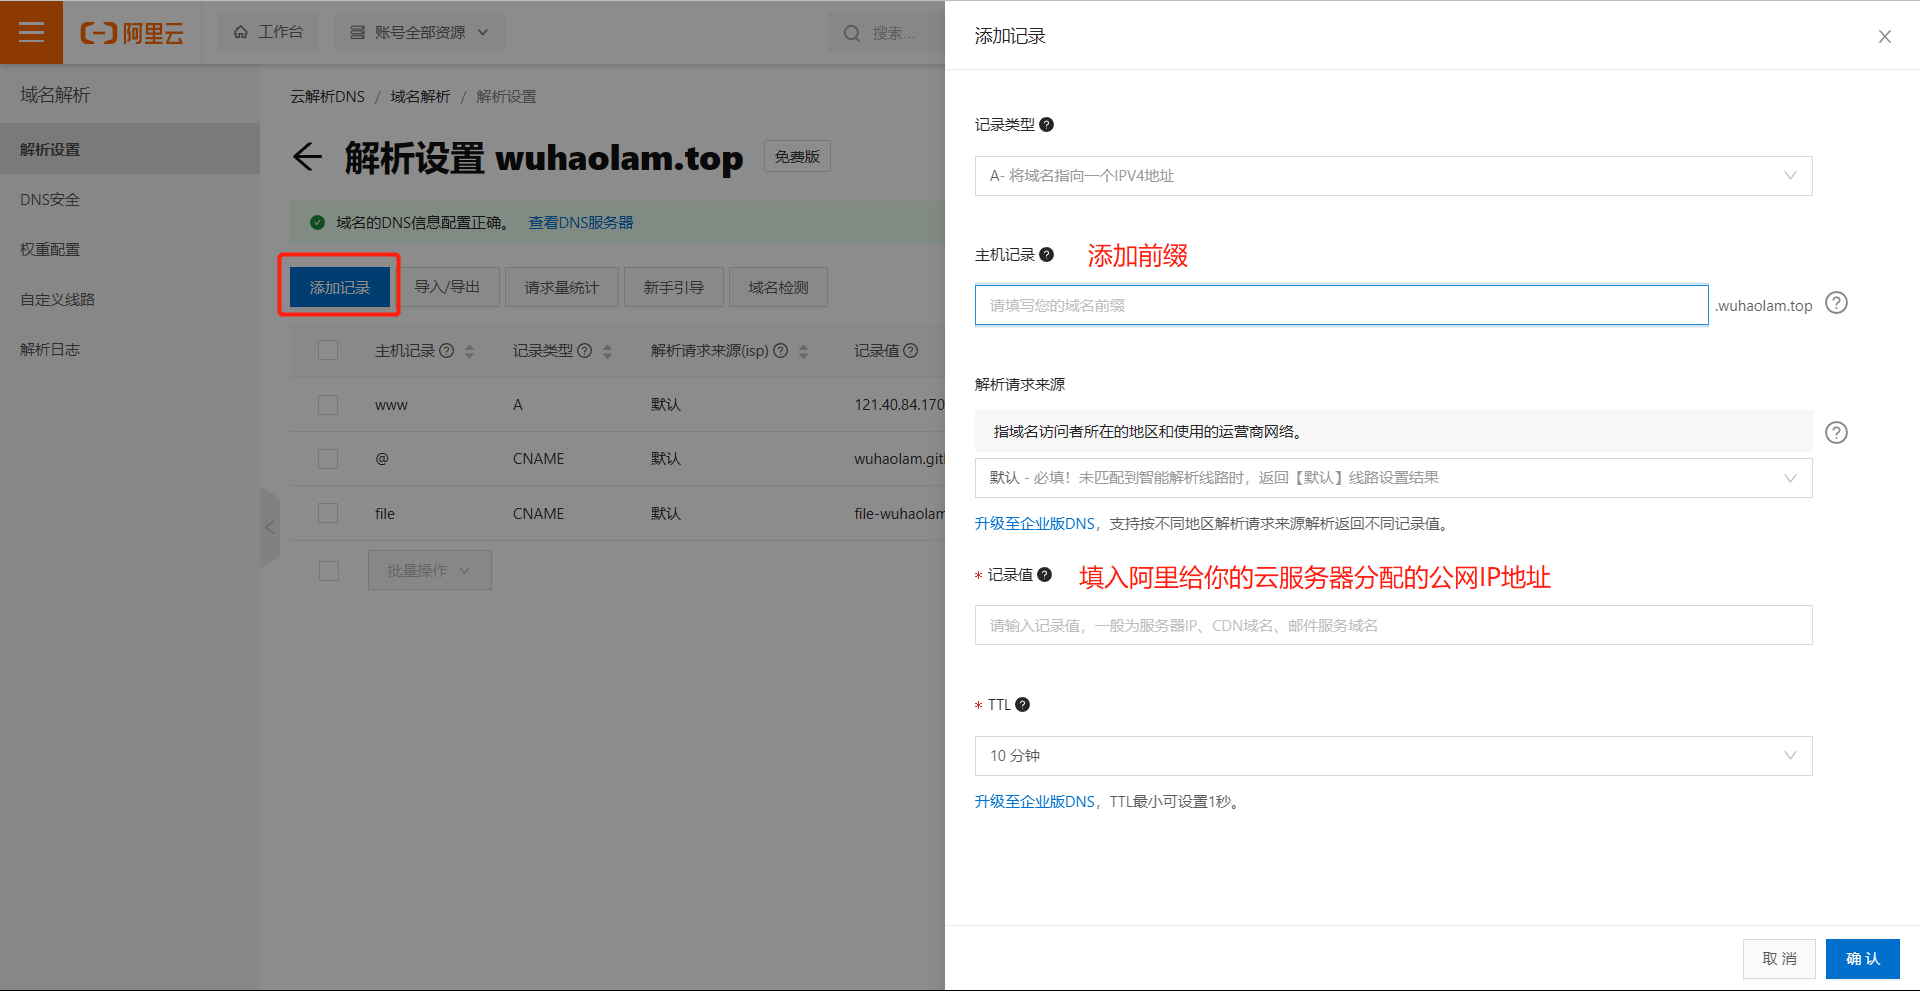
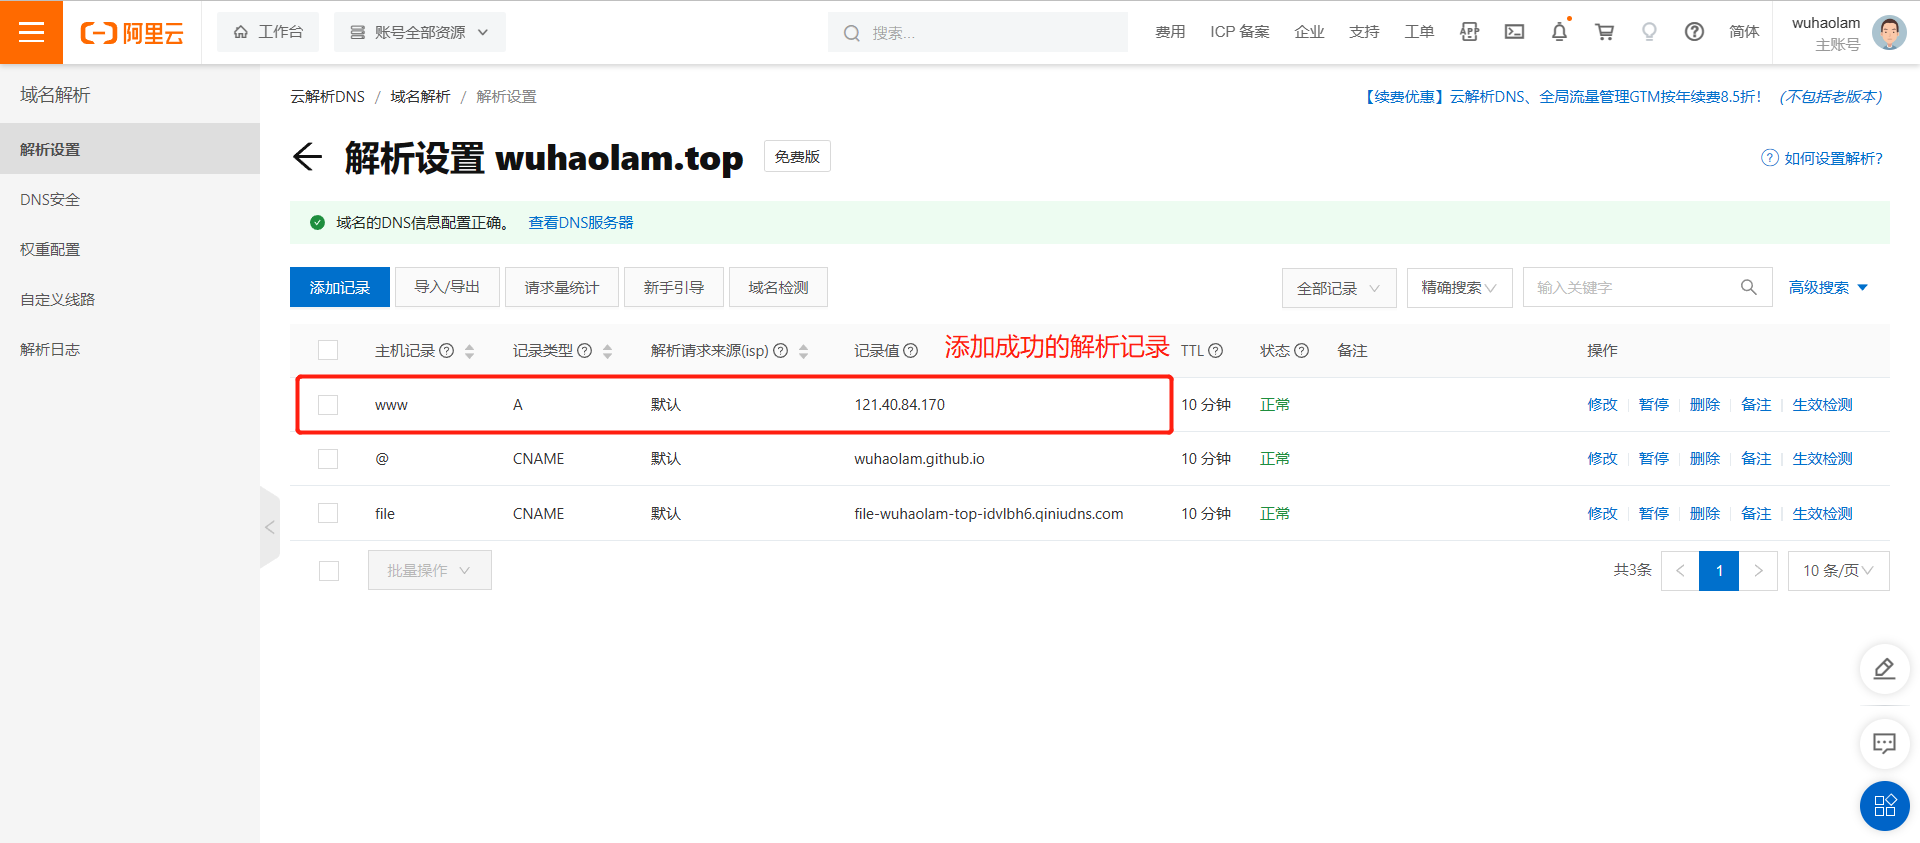
2、在控制台 —> 域名控制台找到自己购买的域名,并配置网站的解析记录
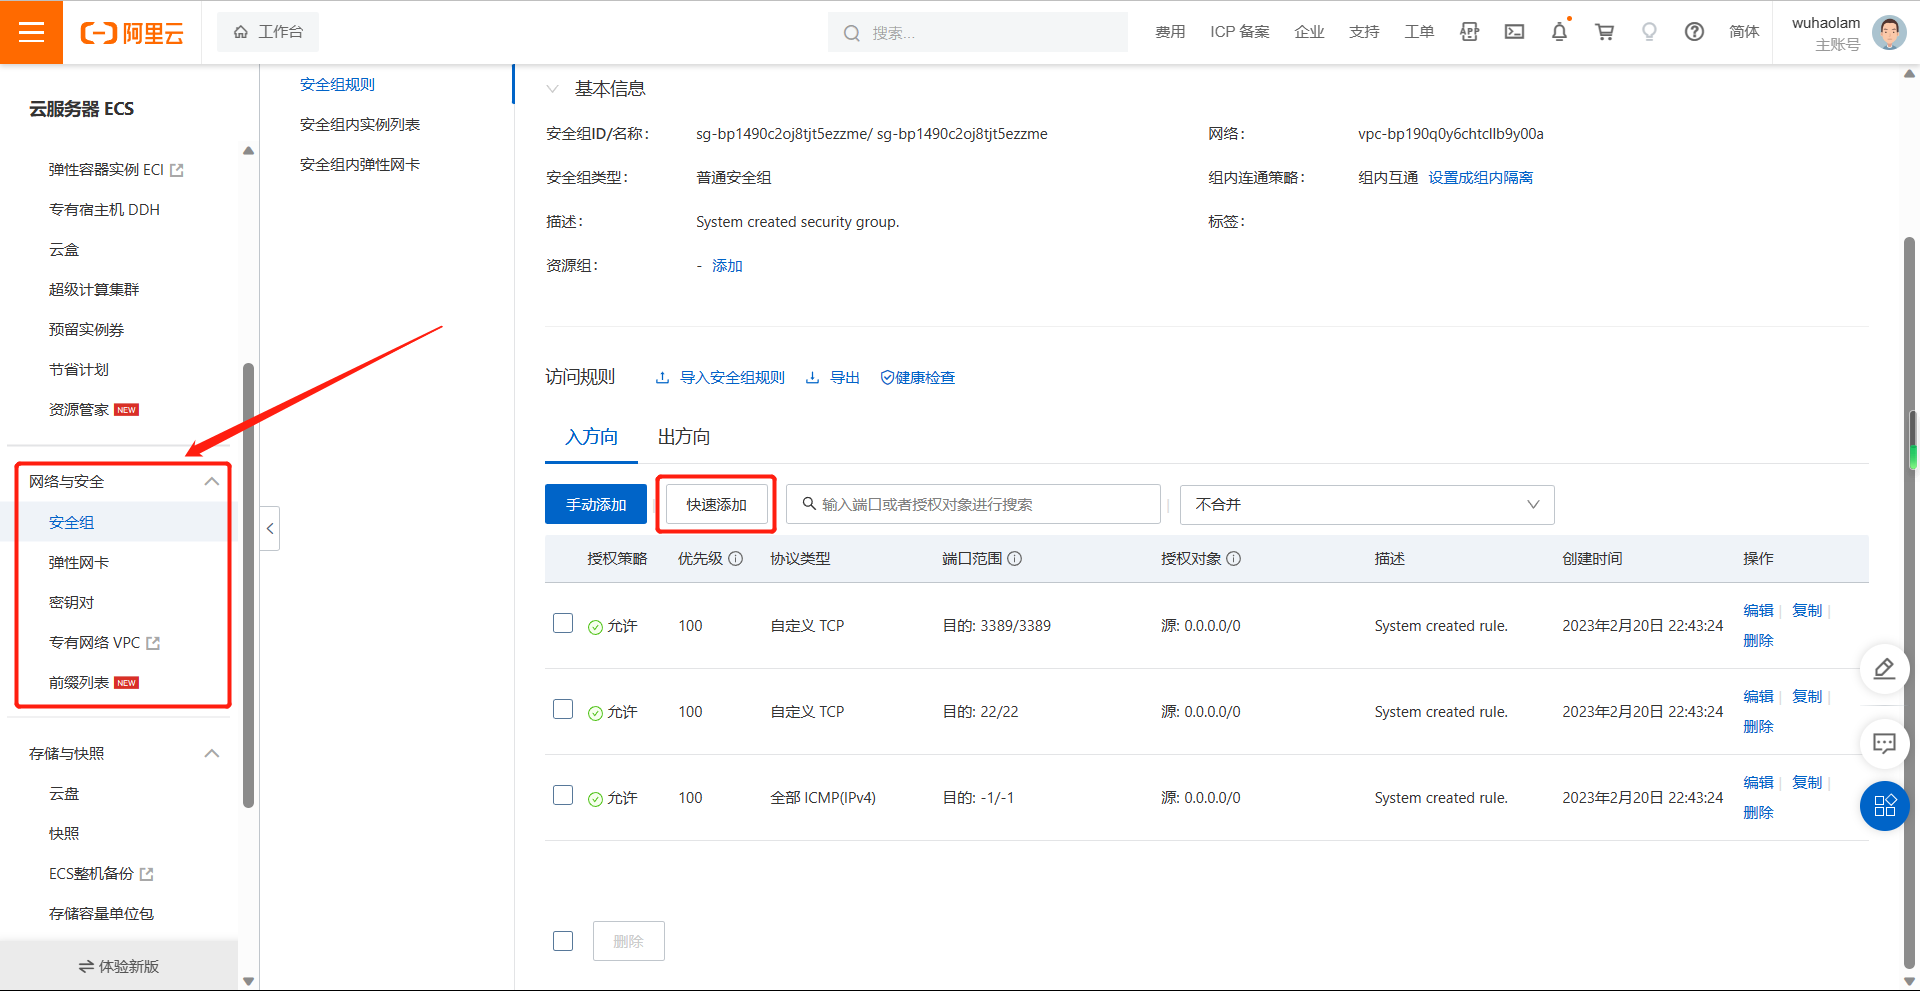
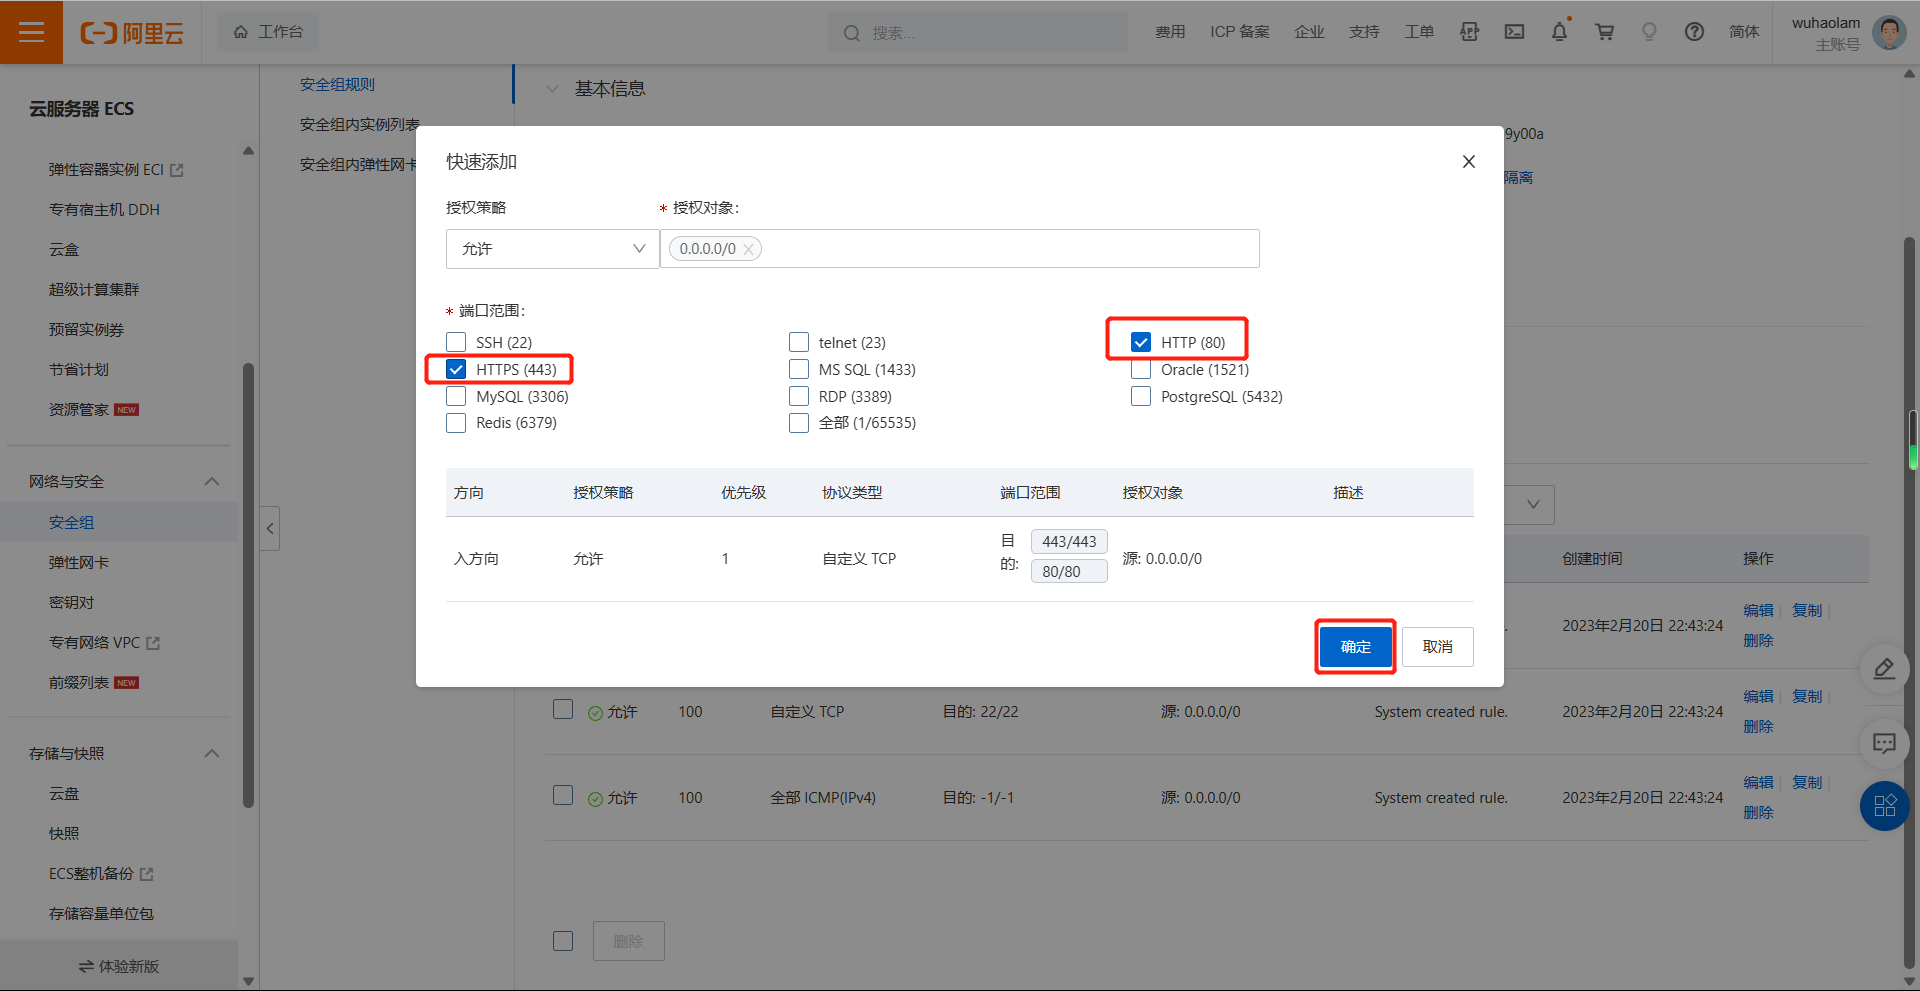
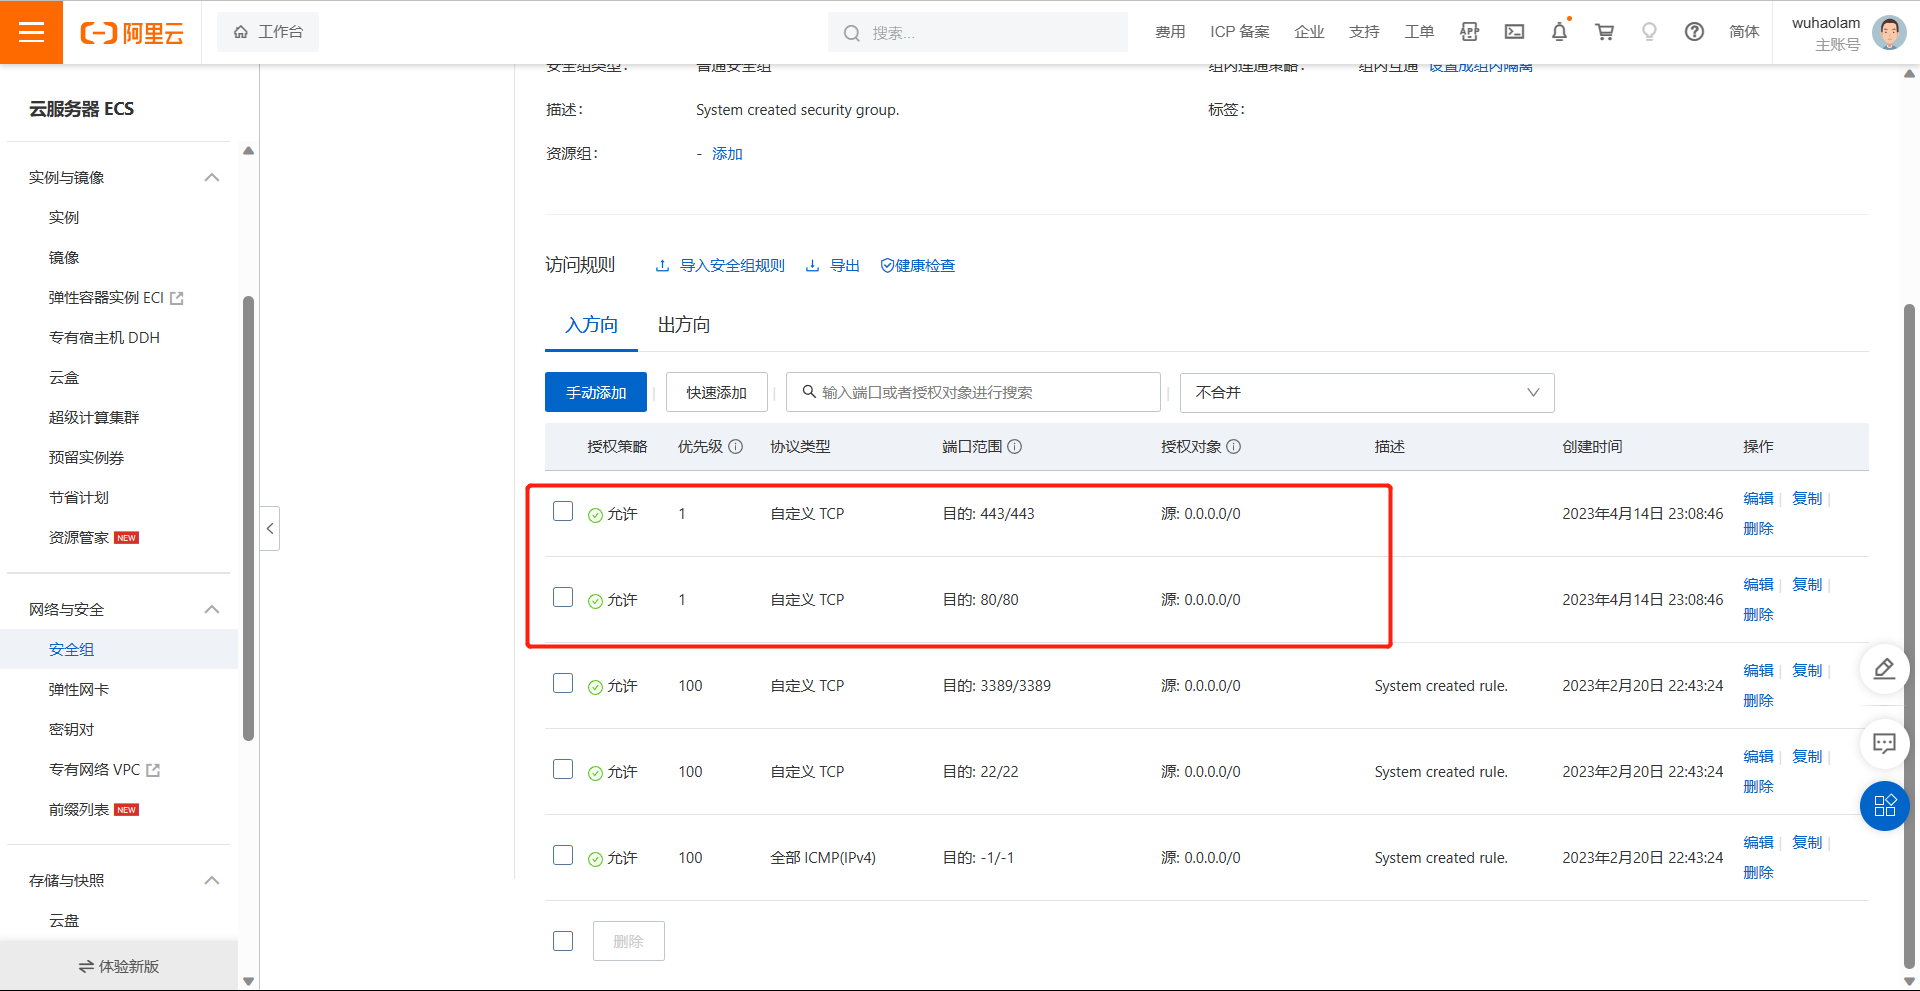
3、在云服务器的控制台中配置安全组规则,允许80或443端口
:warning:使用xshell或其它远程连接工具登录到自己的云服务器中,然后开始部署
二、部署 MySQL5.7 版本数据库
2.1 二进制脚本安装MySQL5.7
1
2
3
4
5
6
7
8
9
10
11
12
13
14
15
16
17
18
19
20
21
22
23
24
25
26
27
28
29
30
31
32
33
34
35
36
37
38
39
40
41
42
43
44
45
46
47
48
49
50
51
52
53
54
55
56
57
58
59
60
61
62
63
64
65
66
67
68
69
70
71
72
73
74
75
76
77
78
|
[root@wh-aliyun ~]
. /etc/init.d/functions
PackageDir="/root"
PackageName="mysql-5.7.40-linux-glibc2.12-x86_64"
MysqlRootPassword="wuhaolam"
ID=`ip a show eth0 | awk -F'[./]' '/\<inet\>/ {print $4}'`
yum -y install libaio numactl-libs libncurses* &> /dev/null || { echo -e "\033[1;31minstall package fail\033[0m";exit 1; }
if ! id mysql &> /dev/null;then
groupadd mysql
useradd -r -g mysql -s /sbin/nologin mysql
fi
if [ -d /data/mysql ];then
action "数据库存在,退出安装" /bin/false
exit 1
else
mkdir -p /data/mysql/ && chown -R mysql:mysql /data/mysql/
fi
[ -d /mysql/binlog/ ] || mkdir -p /mysql/binlog/ && chown -R mysql:mysql /mysql/binlog/
[ -e ${PackageDir}/${PackageName}.tar.gz ] || { echo -e "\033[1;31mPackage file is not exits\033[0m";exit 1; }
tar xf ${PackageDir}/${PackageName}.tar.gz -C /usr/local/
cd /usr/local/
ln -s ${PackageName}/ mysql
chown -R root:root /usr/local/mysql/
echo 'PATH=/usr/local/mysql/bin:$PATH' > /etc/profile.d/mysql.sh
. /etc/profile.d/mysql.sh
cat > /etc/my.cnf << EOF
[client]
port=3306
socket=/data/mysql/mysql.sock
[mysql]
prompt="\\r:\\m:\\s(\\u@\\h) [\\d]>\\_"
[mysqld]
log-bin=/mysql/binlog/mysql-bin
server-id=${ID}
datadir=/data/mysql
socket=/data/mysql/mysql.sock
user=mysql
symbolic-links=0
skip_name_resolve=1
log-error=/data/mysql/mysql.log
pid-file=/data/mysql/mysql.pid
EOF
mysqld --initialize --user=mysql --datadir=/data/mysql &> /dev/null
cp /usr/local/mysql/support-files/mysql.server /etc/init.d/mysqld
chkconfig --add mysqld
chkconfig mysqld on
service mysqld start &> /dev/null && echo -e "\033[1;32mMySQL startup success\033[0m" || { echo -e "\033[1;31mMySQL startup failed\033[0m";exit 1; }
Password=`awk '/A temporary password/ {print $11}' /data/mysql/mysql.log`
mysqladmin -uroot -p${Password} password ${MysqlRootPassword} &> /dev/null && action "数据库安装完成" /bin/true || action "密码修改失败" /bin/false
|
2.2 创建wordpress数据库和用户并授权
1
2
3
4
5
6
7
8
9
10
11
12
13
| [root@wh-aliyun ~]
[root@wh-aliyun ~]
:44: (root@localhost) [(none)]> create database wordpress;
Query OK, 1 row affected (0.00 sec)
:46: (root@localhost) [(none)]> create user wordpress@'172.22.%.%' identified by '123456';
Query OK, 0 rows affected (0.00 sec)
:47: (root@localhost) [(none)]> grant all on wordpress.* to wordpress@'172.22.%.%';
Query OK, 0 rows affected (0.00 sec)
:48: (root@localhost) [(none)]> flush privileges;
Query OK, 0 rows affected (0.00 sec)
|
三、部署 PHP
3.1 编译安装php 7.4
1
2
3
4
5
6
7
8
9
10
11
12
13
14
15
16
17
18
19
20
21
22
23
24
25
26
27
28
29
30
31
32
33
34
35
36
37
38
39
| [root@wh-aliyun ~]
[root@wh-aliyun ~]
[root@wh-aliyun ~]
[root@wh-aliyun php-7.4.30]
[root@wh-aliyun php-7.4.30]
[root@wh-aliyun php-7.4.30]
[root@wh-aliyun php-7.4.30]
[root@wh-aliyun php-7.4.30]
[root@wh-aliyun php-7.4.30]
[root@wh-aliyun php-7.4.30]
[root@wh-aliyun etc]
[root@wh-aliyun etc]
[root@wh-aliyun php-fpm.d]
[root@wh-aliyun php-fpm.d]
user = nginx
group = nginx
access.log = log/$pool.access.log
slowlog = log/$pool.log.slow
[root@wh-aliyun ~]
[root@wh-aliyun ~]
[root@wh-aliyun ~]
[14-Apr-2023 23:49:23] NOTICE: configuration file /apps/php/etc/php-fpm.conf test is successful
[root@wh-aliyun ~]
[root@wh-aliyun ~]
[root@wh-aliyun ~]
|-php-fpm(294818)-+-php-fpm(294819)
| `-php-fpm(294820)
|
四、部署Nginx
4.1 编译安装 nginx
1
2
3
4
5
6
7
8
9
10
11
12
13
14
15
16
17
18
19
20
21
22
23
24
25
26
27
28
29
30
31
32
33
34
35
36
37
38
39
40
41
42
43
44
45
46
47
48
49
50
51
52
53
54
55
56
57
58
59
60
61
62
63
64
65
66
67
68
69
70
71
72
73
74
75
76
77
78
79
80
81
82
83
84
85
86
87
|
[root@wh-aliyun ~]
. /etc/init.d/functions
PackageDir="/root"
PackageName="nginx-1.18.0"
SUFFIX='tar.gz'
PACKAGE_INSTALL_DIR="/apps/nginx"
PackageURL=https://nginx.org/download/nginx-1.18.0.tar.gz
PIDFileDIR=/apps/nginx/run
CPU_CORE=`lscpu | awk '/^CPU\(s\)/ {print $2}'`
if ! id nginx &> /dev/null;then
useradd -r -s /sbin/nologin nginx
fi
if [ -d ${PACKAGE_INSTALL_DIR} ];then
action "nginx已经安装,退出安装" /bin/false
exit 1
else
mkdir -p ${PACKAGE_INSTALL_DIR} || { echo -e "\033[1;31m${PACKAGE_INSTALL_DIR} 安装目录创建失败\033[0m";exit 1; }
fi
echo -e "\033[1;32m正在安装相关依赖包...\033[0m"
yum -y install gcc pcre-devel openssl-devel zlib-devel wget &> /dev/null || { echo -e "\033[1;31minstall package fail\033[0m";exit 1; }
if ! [ -e ${PackageDir}/${PackageName}.${SUFFIX} ];then
echo -e "\033[1;31m${PackageName}.${SUFFIX} file is not exits, will online download...\033[0m"
wget -P ${PackageDir} ${PackageURL} || { echo -e "\033[1;31mFile download fail\033[0m";exit 1; }
fi
action "Start compiling and installing Nginx1.8" /bin/true
tar xf ${PackageDir}/${PackageName}.${SUFFIX} -C /usr/local/
cd /usr/local/${PackageName}
./configure --prefix=${PACKAGE_INSTALL_DIR} --user=nginx --group=nginx --with-http_ssl_module --with-http_v2_module --with-http_realip_module --with-http_stub_status_module --with-http_gzip_static_module --with-pcre --with-stream --with-stream_ssl_module --with-stream_realip_module
make -j ${CPU_CORE} || { echo -e "\033[1;31m编译失败\033[0m";exit 1; }
make install && echo -e "\033[1;32m编译安装成功\033[0m" || { echo -e "\033[1;31m编译安装失败\033[0m";exit 1; }
chown -R nginx:nginx ${PACKAGE_INSTALL_DIR}
ln -s ${PACKAGE_INSTALL_DIR}/sbin/nginx /usr/sbin
cat > /usr/lib/systemd/system/nginx.service << EOF
[Unit]
Description=The nginx HTTP and reverse proxy server
After=network.target remote-fs.target nss-lookup.target
[Service]
Type=forking
PIDFile=${PIDFileDIR}/nginx.pid
ExecStartPre=/usr/bin/rm -f ${PIDFileDIR}/nginx.pid
ExecStartPre=/usr/sbin/nginx -t
ExecStart=/usr/sbin/nginx
ExecReload=/bin/kill -s HUP \$MAINPID
KillSignal=SIGQUIT
TimeoutStopSec=5
KillMode=mixed
PrivateTmp=true
[Install]
WantedBy=multi-user.target
EOF
sed -Ei.bak -e "/pid/s@.*@pid ${PIDFileDIR}/nginx.pid;@" -e "/\<worker_processes\>/s@.*@worker_processes ${CPU_CORE};@" ${PACKAGE_INSTALL_DIR}/conf/nginx.conf
mkdir -p ${PIDFileDIR}
systemctl daemon-reload &> /dev/null
systemctl enable --now nginx &> /dev/null || { echo -e "\033[1;31mNginx server start Fail\033[0m";exit 1; }
action "Nginx server started success" /bin/true
|
4.2 配置Nginx支持fastcgi
1
2
3
4
5
6
7
8
9
10
11
12
13
14
15
16
17
18
19
20
21
22
23
24
25
26
27
28
29
30
31
32
33
34
35
36
|
[root@wh-aliyun ~]
worker_processes 1;
pid /apps/nginx/run/nginx.pid;
events {
worker_connections 1024;
}
http {
include mime.types;
default_type application/octet-stream;
sendfile on;
keepalive_timeout 65;
server {
listen 80;
server_name www.wuhaolam.top;
location / {
root /data/nginx/wordpress;
index index.php index.html index.htm;
}
error_page 500 502 503 504 /50x.html;
location = /50x.html {
root html;
}
location ~ \.php$ {
root /data/nginx/wordpress;
fastcgi_pass 127.0.0.1:9000;
fastcgi_index index.php;
fastcgi_param SCRIPT_FILENAME $document_root$fastcgi_script_name;
include fastcgi_params;
}
}
}
[root@wh-aliyun ~]
nginx: the configuration file /apps/nginx/conf/nginx.conf syntax is ok
nginx: configuration file /apps/nginx/conf/nginx.conf test is successful
[root@wh-aliyun ~]
|
五、部署WordPress
5.1 准备WordPress 文件
1
2
3
4
| [root@wh-aliyun ~]
[root@wh-aliyun ~]
[root@wh-aliyun ~]
[root@wh-aliyun ~]
|
5.2 初始化页面
在浏览器输入网站的地址,这里的地址是一开始在添加域名解析记录处的地址
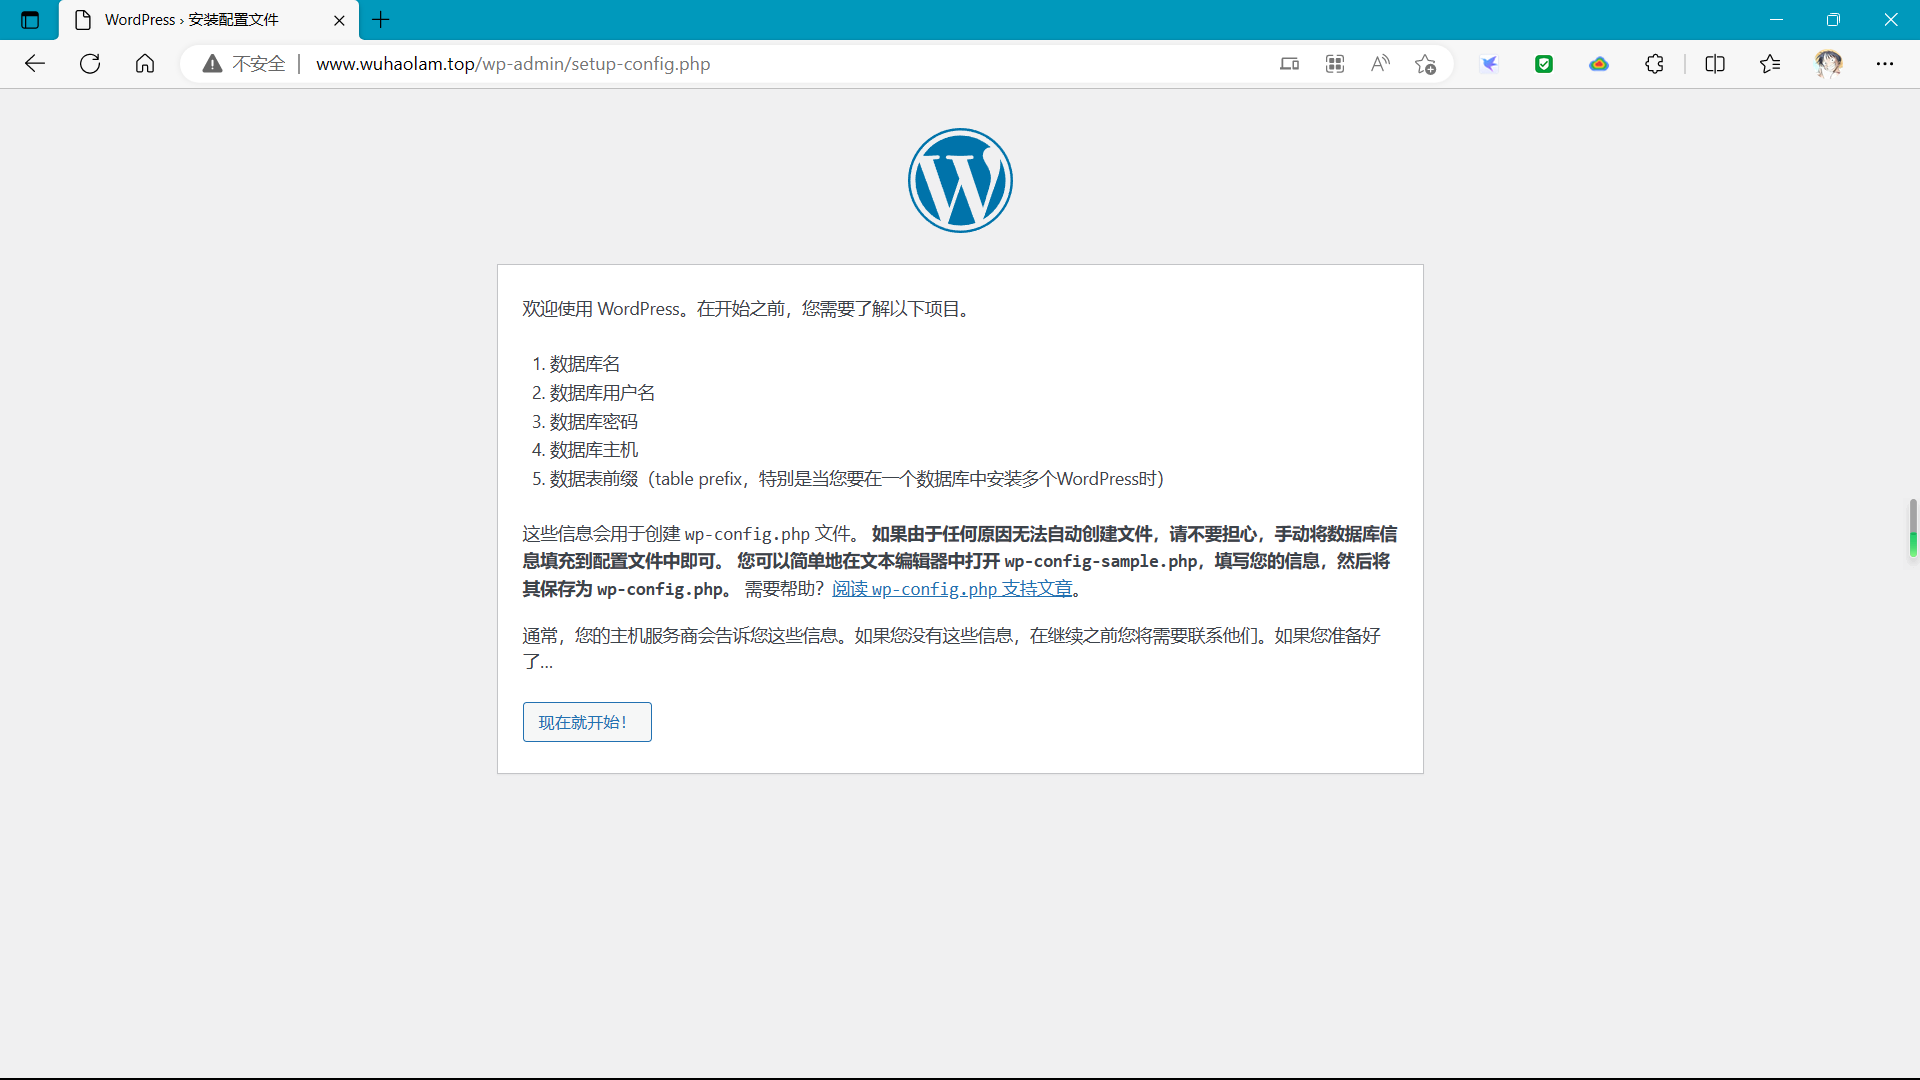
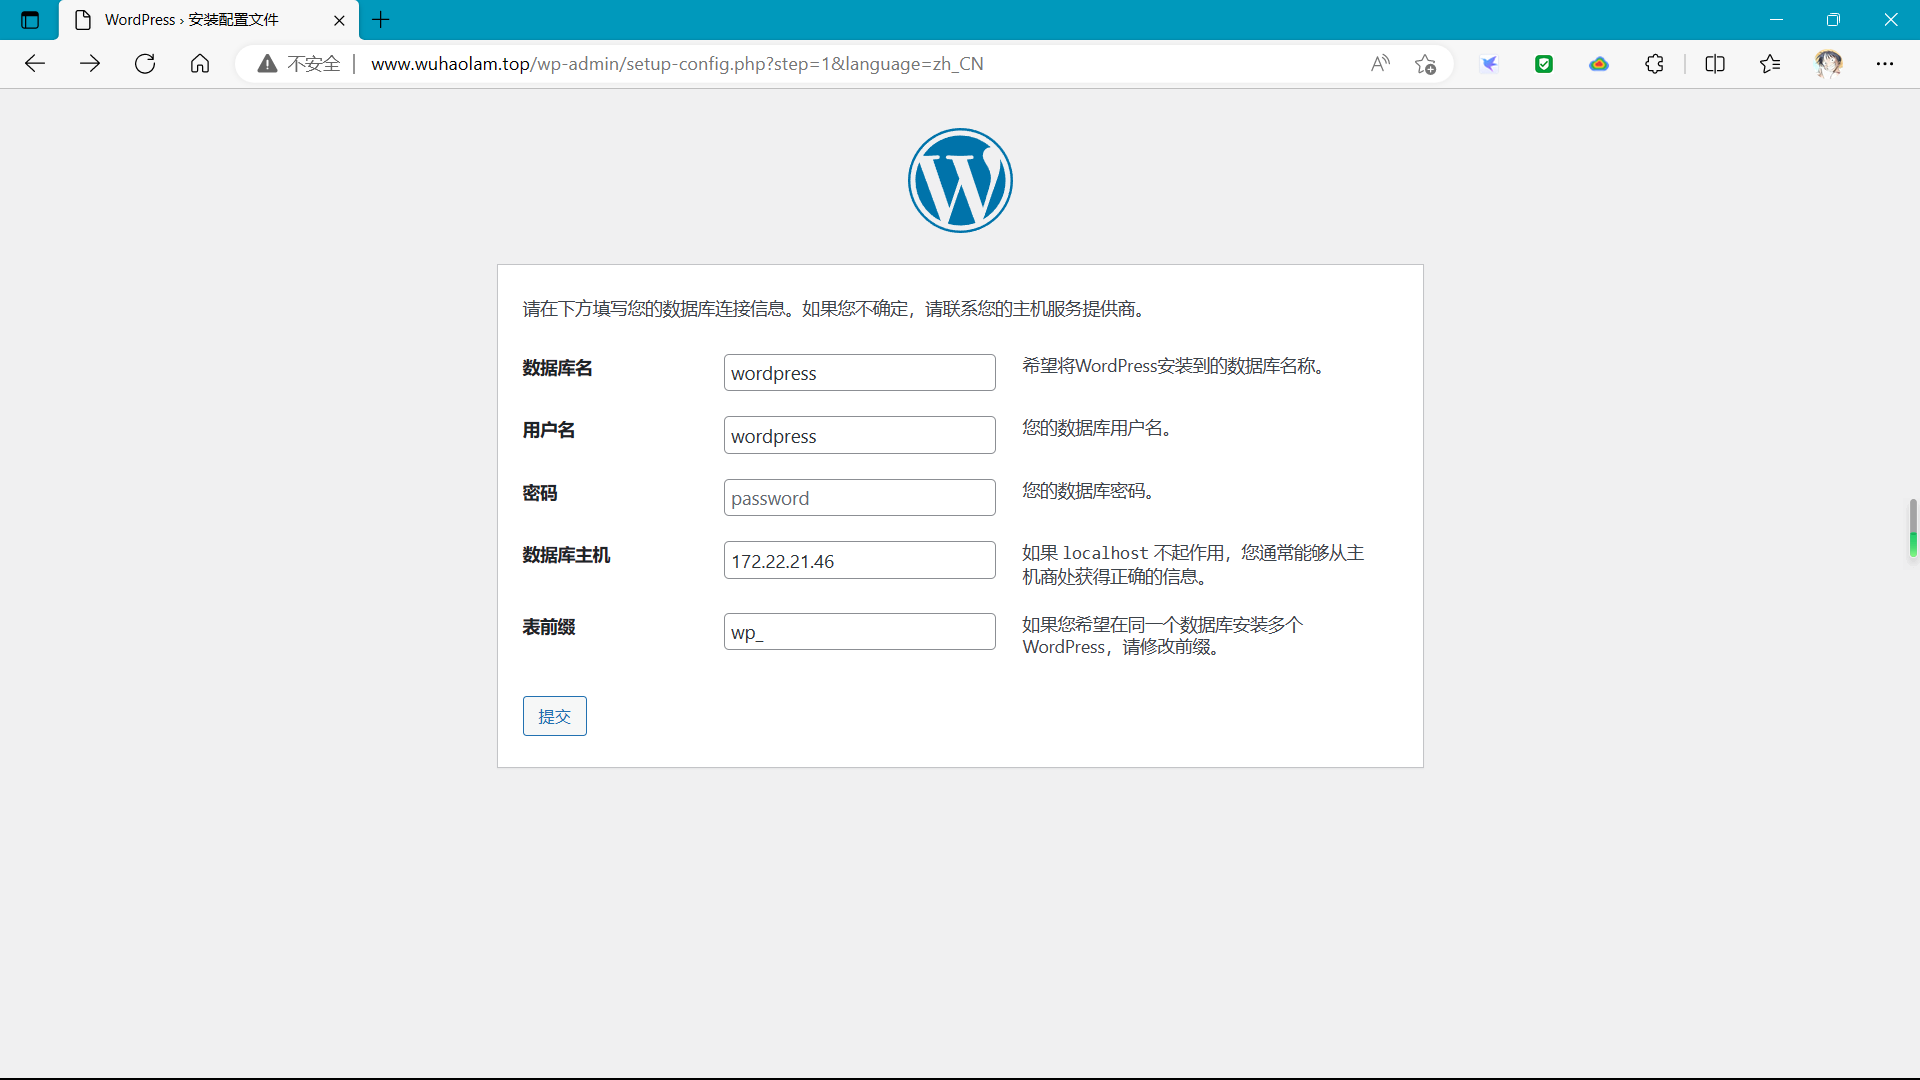

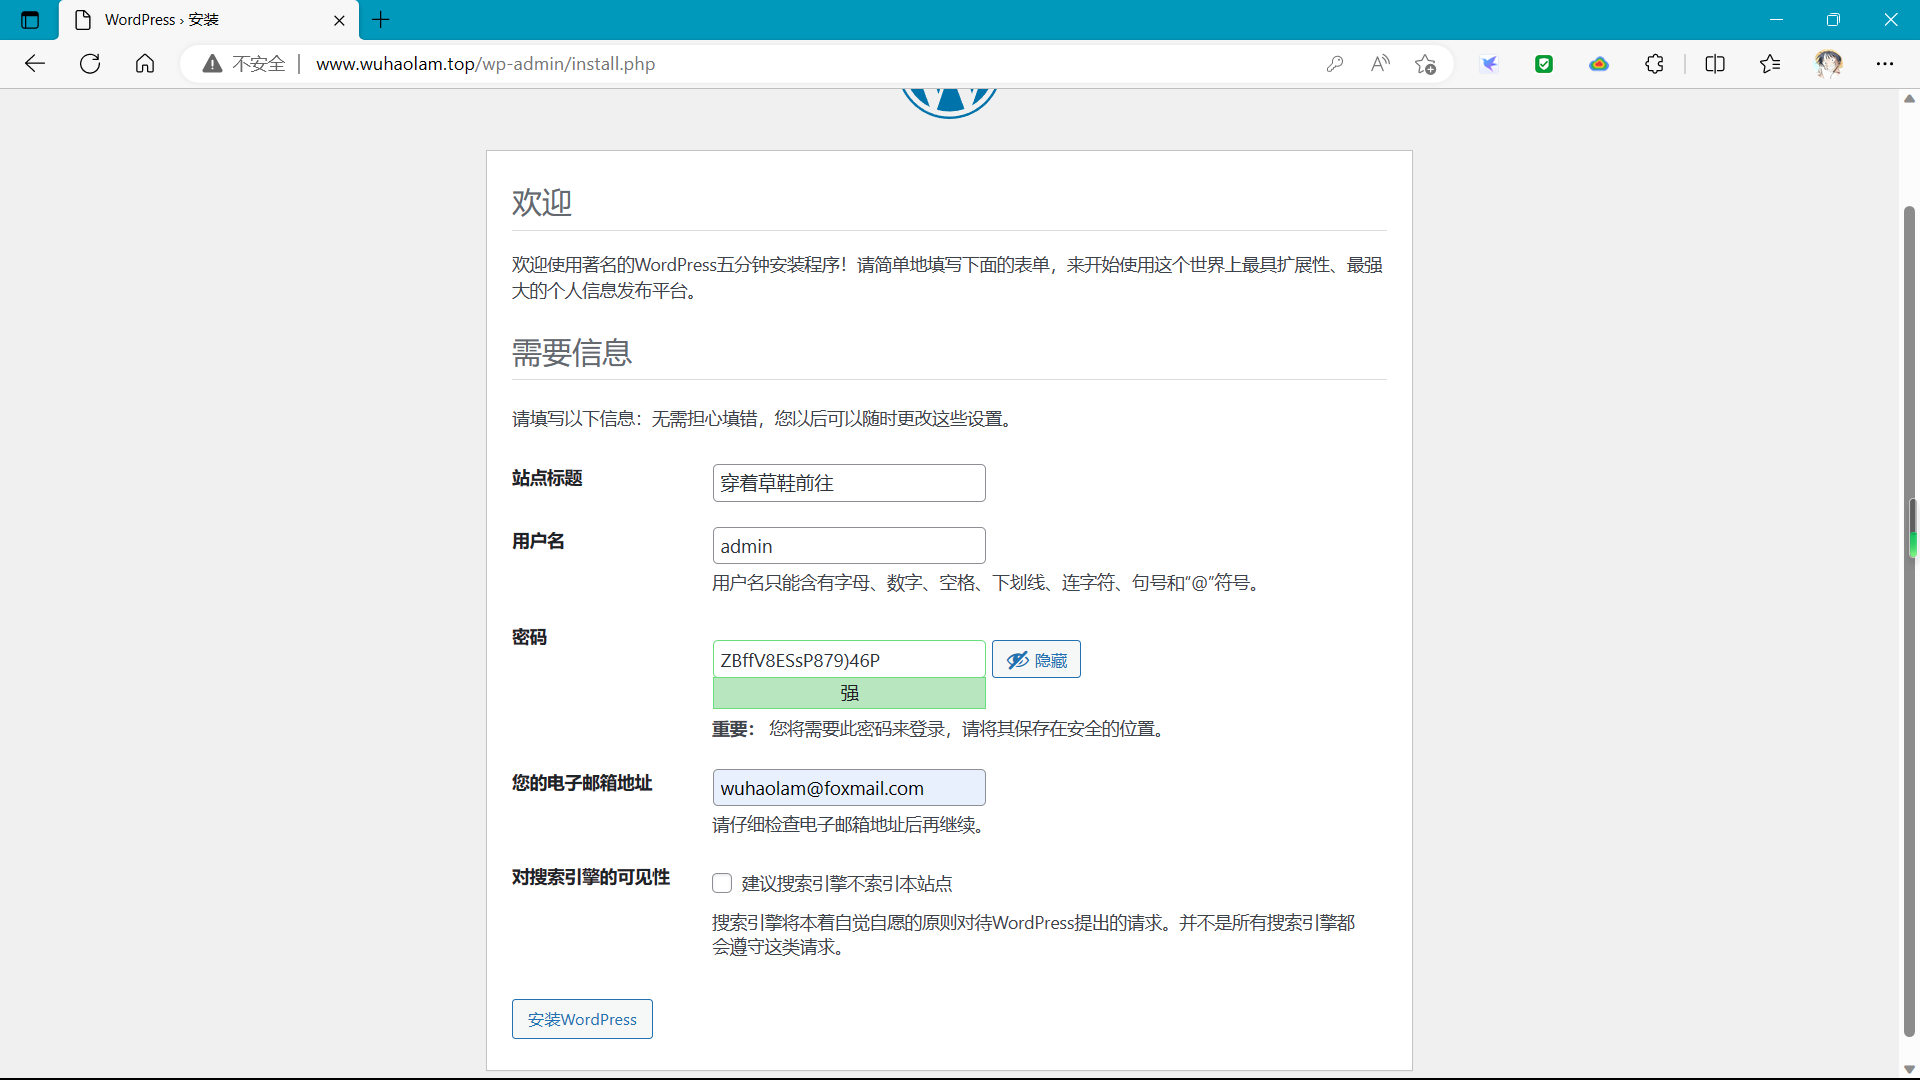
5.4 登录进入后台管理界面
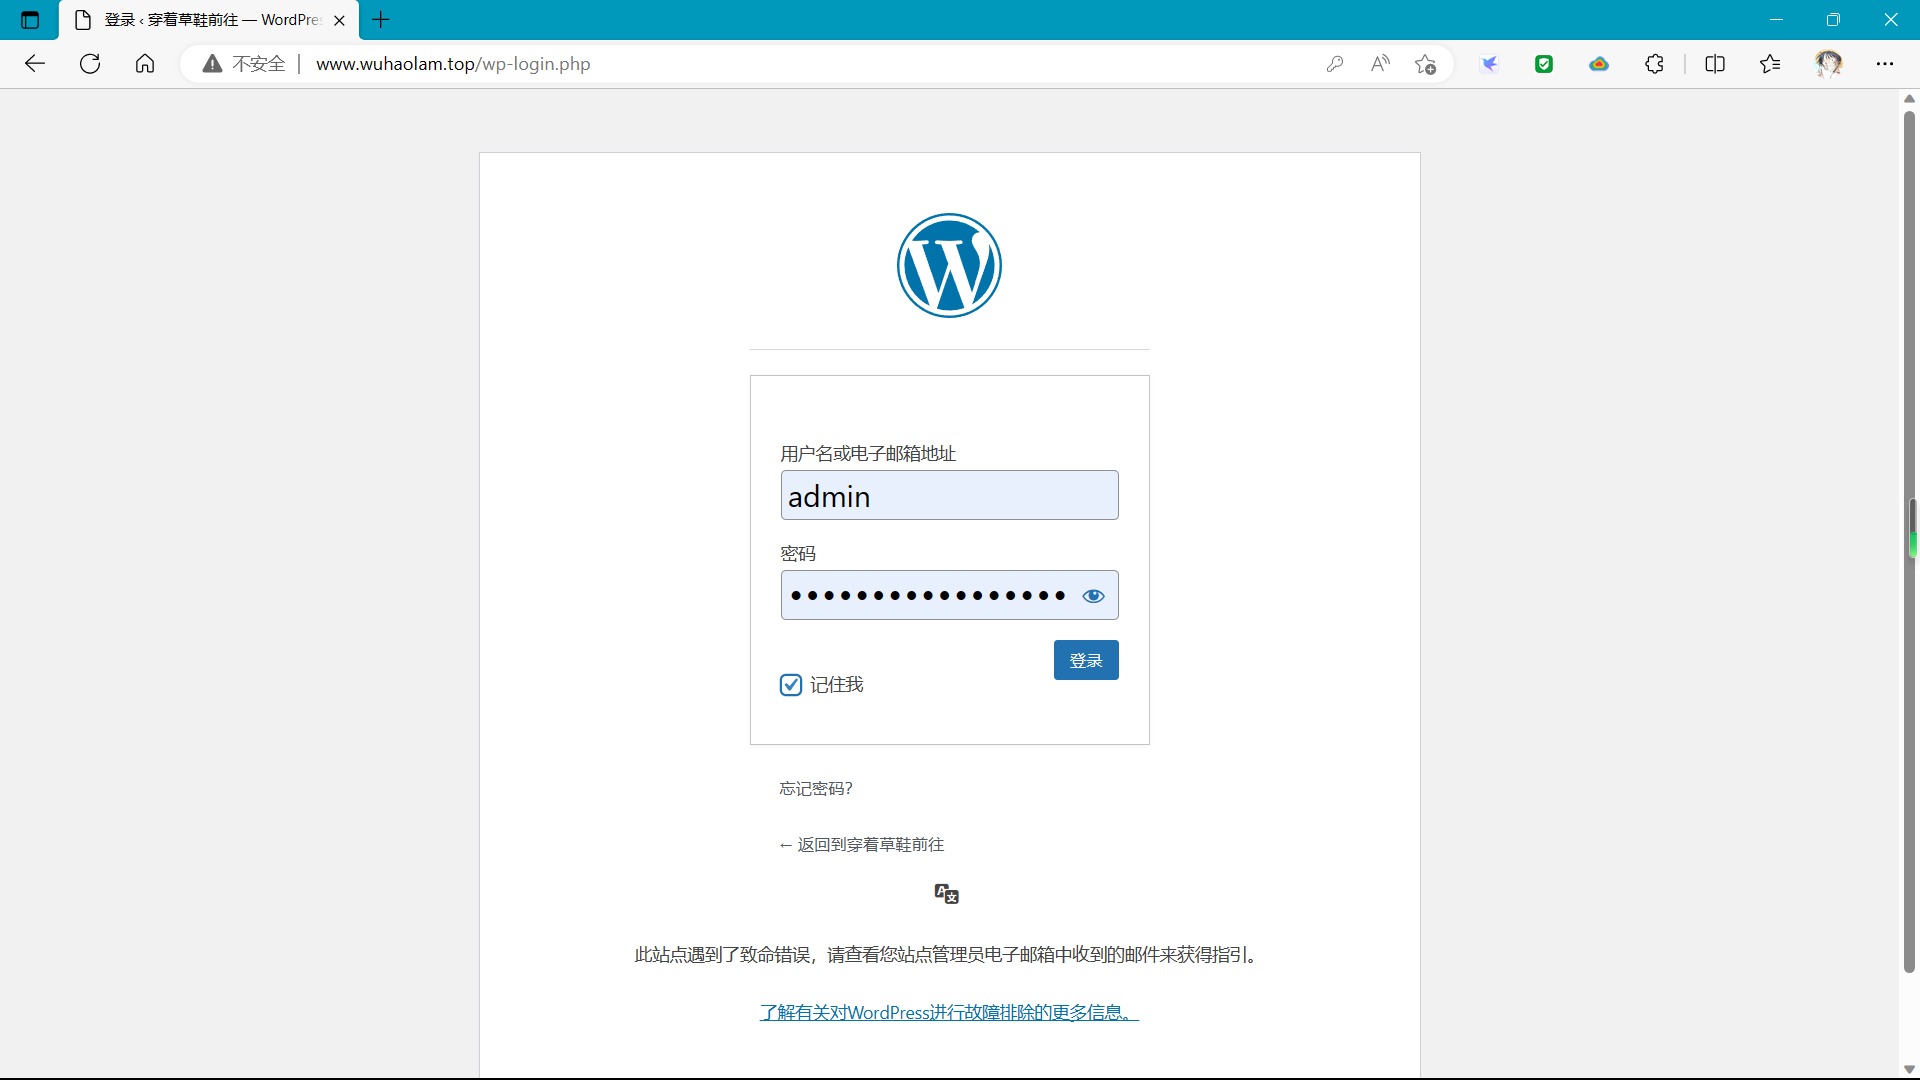

5.5 配置允许上传最大页面
1
2
3
4
5
6
7
8
9
10
11
12
| [root@wh-aliyun ~]
server{
client_max_body_size 10m;
...
}
[root@wh-aliyun ~]
post_max_size = 30M
upload_max_filesize = 20M
[root@wh-aliyun ~]
|
5.6 安全加固
1
2
3
4
5
6
7
8
9
10
11
12
13
14
15
16
17
18
19
20
21
22
23
24
25
26
27
28
29
30
31
32
33
34
35
36
37
|
[root@wh-aliyun ~]
user nginx nginx;
worker_processes 1;
pid /apps/nginx/run/nginx.pid;
events {
worker_connections 1024;
}
http {
include mime.types;
default_type application/octet-stream;
sendfile on;
keepalive_timeout 65;
server {
listen 80;
server_name www.wuhaolam.top;
server_tokens off;
client_max_body_size 10m;
location / {
root /data/nginx/wordpress;
index index.php index.html index.htm;
}
error_page 500 502 503 504 /50x.html;
location = /50x.html {
root html;
}
location ~ \.php$ {
root /data/nginx/wordpress;
fastcgi_pass 127.0.0.1:9000;
fastcgi_index index.php;
fastcgi_param SCRIPT_FILENAME $document_root$fastcgi_script_name;
include fastcgi_params;
fastcgi_hide_header X-Powered-By;
}
}
}
[root@wh-aliyun ~]
|
5.7 配置 php 开启 opcache 加速
1
2
3
4
5
6
7
|
[root@wh-aliyun ~]
[opcache]
; Determines if Zend OPCache is enabled
zend_extension=opcache.so
opcache.enable=1
[root@wh-aliyun ~]
|
六、发表一篇文章并查看
1、写一篇文章并发表
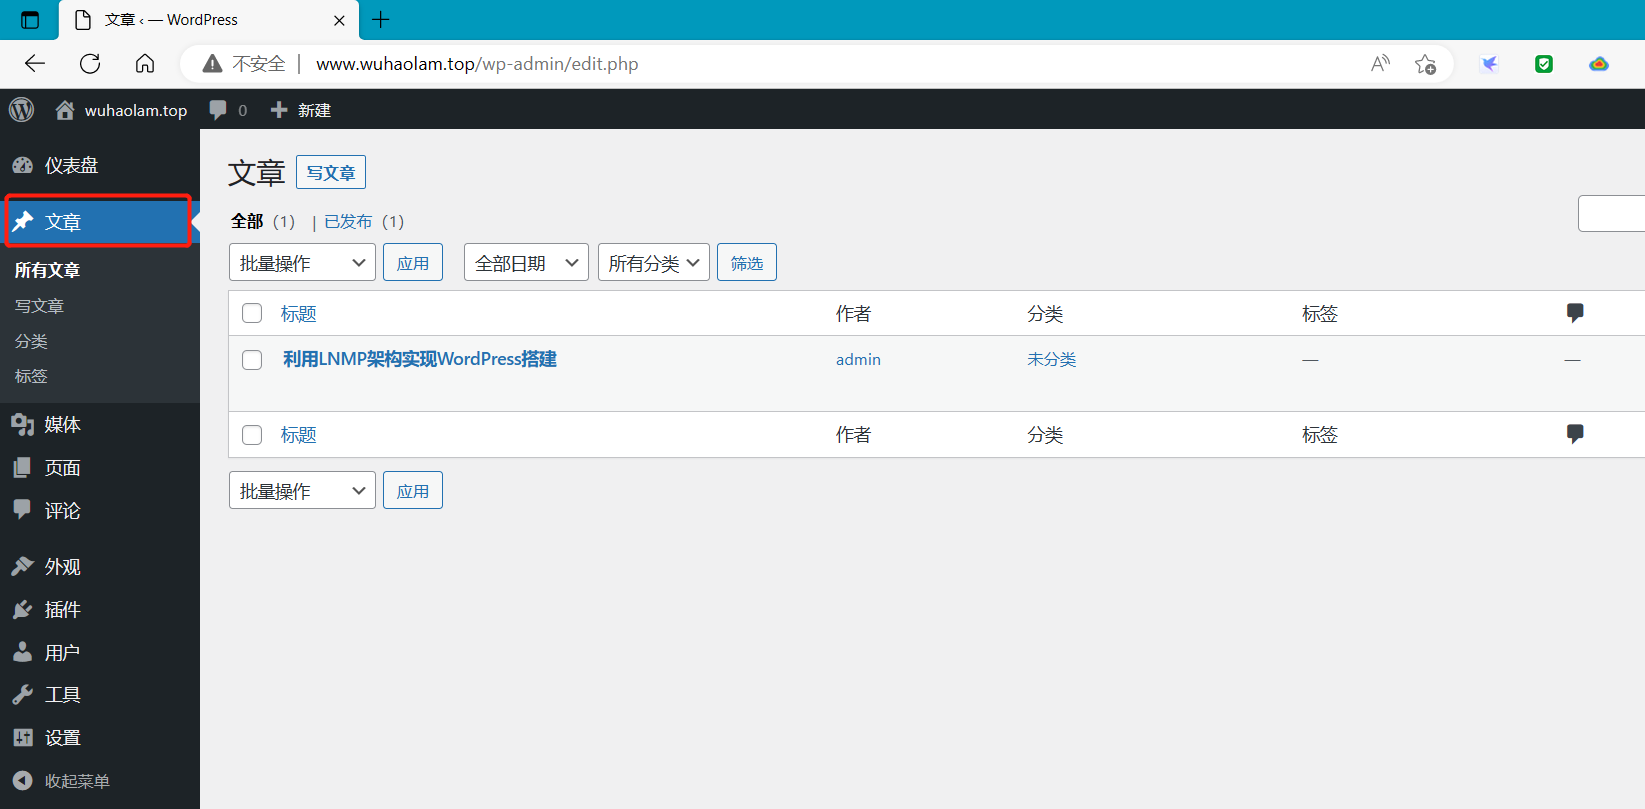
2、查看
